
I'm very excited today as my new product ranges, including badges, magnets and lavender bags are now all available on my website. Although many of them have been up on my Not on the High Street shop for a few weeks now, it has taken a little longer to update my own site, but it is now live which is great news!

Over the last couple of months, I have begun to concentrate more and more on little handmade gift items such as embroidered badges, fridge magnets and lavender bags as opposed to my printed range. This is for a couple of reasons really.... over the last year as I have been developing my business, I've had time to work out which products I like making the best, what my bestsellers are and alternatively which things have proved problematic. It has been a big learning curve - and I am still learning for sure, but it is a conscious decision to try a slightly different approach.
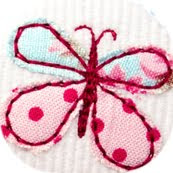
Since I purchased my badge maker a few months ago, it has become somewhat of a best friend, and I do think it is one of the best things I have bought in a long long time! Although they can be fiddly sometimes, my badges and magnets are fast becoming my most popular sellers, which is very lovely as I've not been selling them long at all. Working on such a tiny scale is rewarding when you see the finished product and I think they look so smart all lined up on their backing cards... what do you all think?
Concentrating more on handmade products, it also means that I don't have as much reliance on printers and suppliers, etc, making it easier for me to control my stock levels. Also, because I don't want to have to place massive orders with manufacturers and printers, I sometimes end up paying a premium for a short print run which isn't very economical. The only downside I guess is that with a bigger emphasis on the handmade and bespoke items, it means more pressure on myself in a way to be able to produce enough to meet demand without my back giving in from too much sewing! I'm sure in the future I will maybe return to having more printed products in my range, but I like that at the moment, everything is made by hand here in my Somerset, with love and care and passion.


Hurray, you made it to the end of my ramblings for today! I hope you like my new products, I would love to hear your thoughts on your favourites...etc so do take a look at my website and leave me a comment if you are passing:)
I am also always looking to have more independent shops stocking my products, so if you have a lovely boutique or gorgeous website that you think would suit my products, please email me at hello[at]jennyarnott[dot]co[dot]uk for trade prices and more information, I would love to work with you! x

Over the last couple of months, I have begun to concentrate more and more on little handmade gift items such as embroidered badges, fridge magnets and lavender bags as opposed to my printed range. This is for a couple of reasons really.... over the last year as I have been developing my business, I've had time to work out which products I like making the best, what my bestsellers are and alternatively which things have proved problematic. It has been a big learning curve - and I am still learning for sure, but it is a conscious decision to try a slightly different approach.
Since I purchased my badge maker a few months ago, it has become somewhat of a best friend, and I do think it is one of the best things I have bought in a long long time! Although they can be fiddly sometimes, my badges and magnets are fast becoming my most popular sellers, which is very lovely as I've not been selling them long at all. Working on such a tiny scale is rewarding when you see the finished product and I think they look so smart all lined up on their backing cards... what do you all think?
Concentrating more on handmade products, it also means that I don't have as much reliance on printers and suppliers, etc, making it easier for me to control my stock levels. Also, because I don't want to have to place massive orders with manufacturers and printers, I sometimes end up paying a premium for a short print run which isn't very economical. The only downside I guess is that with a bigger emphasis on the handmade and bespoke items, it means more pressure on myself in a way to be able to produce enough to meet demand without my back giving in from too much sewing! I'm sure in the future I will maybe return to having more printed products in my range, but I like that at the moment, everything is made by hand here in my Somerset, with love and care and passion.


Hurray, you made it to the end of my ramblings for today! I hope you like my new products, I would love to hear your thoughts on your favourites...etc so do take a look at my website and leave me a comment if you are passing:)
I am also always looking to have more independent shops stocking my products, so if you have a lovely boutique or gorgeous website that you think would suit my products, please email me at hello[at]jennyarnott[dot]co[dot]uk for trade prices and more information, I would love to work with you! x


.JPG)


